If you’re looking for a way to manage your pre-orders and backorders, I just figured out how to do it with Quickbooks Premier. It’s super easy!
Note: I use the desktop version that you buy all at once rather than Quickbooks Online. I know that the two are very different, and I’m not sure if the Sales Order functions exists in the online version. If you have the answer to that question, please let us know in the comments below.
I used to keep track of my pre-orders in an Excel file, where I listed what the store has ordered, along with the PO #, Ship Date, and Cancel Date, and then greyed-out the rows after the order had shipped. This way I could sort by ship dates, and see what was left to still send out.
The system broke down if I couldn’t send everything at once for whatever reason. My packing slips and invoices generated by Quickbooks didn’t list the backordered items, which made the customer think I was just short-shipping the order. Even if I let my contact know ahead of time what was happening, there were often people in the receiving and accounting departments who didn’t get the memo, and it would cause a lot of confusion.
Due to a miscommunication error with my supplier, I didn’t receive all of my Spring 2016 inventory together, so I had a lot of partial shipments to send out. I figured there must be a way to record this in Quickbooks, and the trick was to use Sales Orders.
Here’s how to do it:
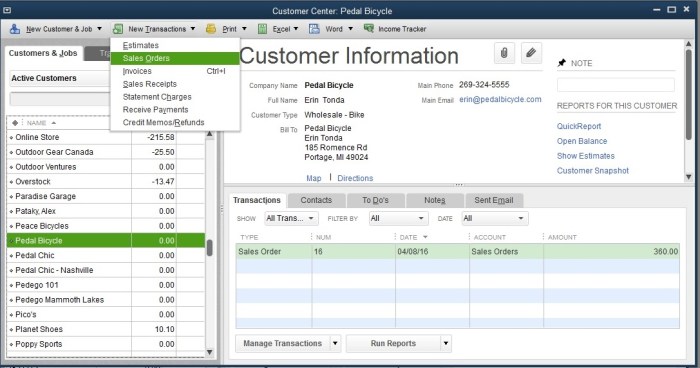
1. In your Customer Center, select the customer and then select “Sales Order” from the New Transactions drop down menu.
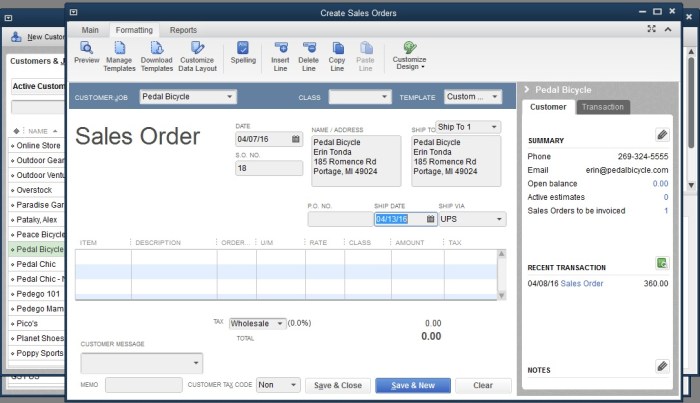
2. Fill out the Sales Order with the order information, including the items ordered, PO #, ship date, etc. If you need to add or delete fields, you can do that by switching to the Formatting tab at top and selecting “Manage Templates”.
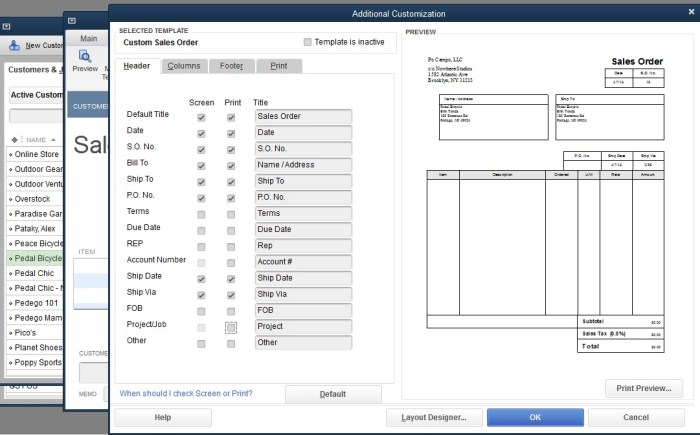
In Manage Templates, select the template you want to edit, then click the “Additional Customization” button at the bottom. This takes you to a window where you can choose which fields you want to appear on screen and on the print-out.
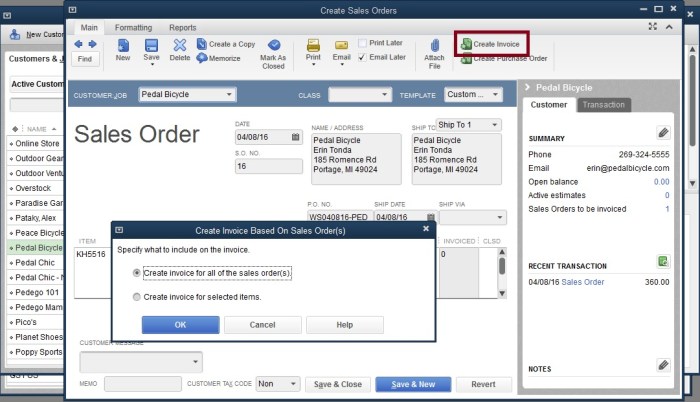
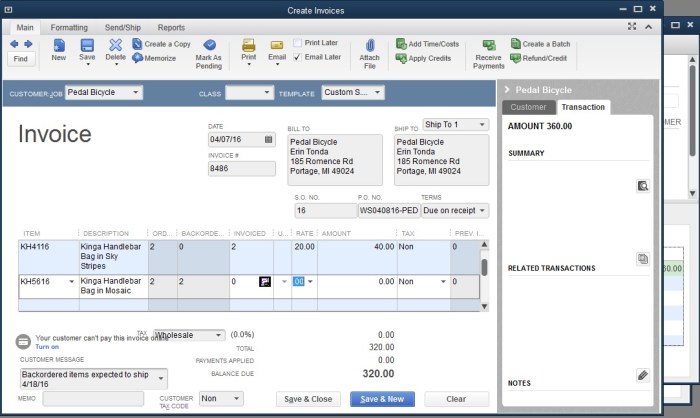
3. Once you have filled out the Sales Order, click the Create Invoice button at the top of the main Sales Order screen. Choose “Create invoice for all of the sales order(s)” option, then click OK.
Put the quantity of items you are shipping and invoicing for in the invoiced column, and the backorder column is automatically updated. I added a customer message at the bottom to indicate when the backordered items would ship.
If the backorder column isn’t showing up, then you need to add it to the template, which you do through Manage Templates as shown above.
Switching the template to Packing Slip template, the backorder items show up here as well, along with the customer message. Now I feel good with including this packing slip in a carton shipped to a store, because they receiver will understand what is happening without having to check with the buyer or with me.

I was pretty excited to discover this handy feature of Quickbooks, and was even more excited when I saw the reporting. By going to Reports > Sales, you can generate a report for either Open Sales Orders by Customer -or- Open Sales Orders by Item, helping me keep on top of everything.
A couple of years ago, I was at a trade show and another vendor asked me, “So, you have an order book for your pre-orders, right?”. And like so many other times when I have no idea what someone is talking about but don’t want to seem clueless, I answered, “Yeah, of course.” Well, I don’t know if the Sales Order function in Quickbooks was what he was talking about, but now I definitely feel like I have a legit way of managing my pre-orders.